How to Valet Your Car at Home
It is always nice to have a clean car. Keeping your car clean not only improves the appearance but protects against general wear and tear. Not to mention, giving your car a valet at home gives a level of satisfaction, knowing that you have a nice, clean, car to drive.
When looking to give your car a spring clean, there are a few options. Naturally, you can pay for a professional car interior valet; however, with a bit of elbow grease, it is possible to valet your car yourself and put that shine back into your vehicle.
If you want to valet your car at home, we have provided some tips on the best ways to clean, what car valeting products to use and how to ensure key areas are not missed. Before we set off talking about valeting your car yourself, however, let’s look at the professional valet car service in a bit more detail.
What is a Car Valet?
Car valeting is the process of professionally cleaning, polishing and waxing a vehicle to achieve a brand new, pristine, and ‘good as new’ look. When professionals valet cars, they are usually looking at providing a service that leaves your car valeted inside and out. A full valet car clean typically includes cleaning the interior and exterior of the vehicle to enhance the car’s look and preserve resale value. This means that a typical car cleaning valet usually includes everything from internal vacuuming to waxing and polishing the car once done.
How Much is a Car Valet?
The cost of a car valet is dependant on a number of factors, including the size and condition of the vehicle. Professional car valets can vary between £30 – £100, based on the amount of dirt inside the vehicle and the size of the vehicle. Typically the bigger the vehicle, the more the car valet will cost.
How to Valet a Car Yourself
Car valeting is typically a professional service, but it is more than possible to valet your car at home with the right products. Below, we go through three different aspects that a professional car valet would – interior valeting, exterior car valeting, and waxing your car. Follow our easy step to step guide on how to valet your car at home.
Interior Car Valeting
- Clear out the car – First of all, make sure that all items are removed from your car and placed out of the way, including the floor mats. Not only does this clean your car but it helps get everything out the way so you can clean them separately.
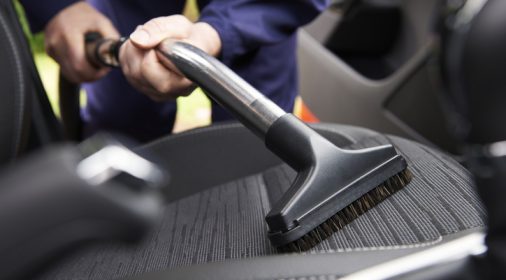
- Vacuuming – Once you have cleared all the items out of your car, begin vacuuming. Start with the car seats – if they are dirty then apply a specialist car cleaning product which should remove the stains. Once you have finished vacuuming then move to the floor of your car. This will ensure that any bits that escaped the vacuum when hoovering the seats will end up being snatched up by the cleaner from the floor.
- Cleaning the upholstery – By using a basic upholstery shampoo it is possible to quickly and efficiently clean the seats of your car. When cleaning upholstery, it is also worth noting that you should allow at least a day for the car seats to dry out before use.
- Dusting – Dust the dashboard, rear window shelf and all other services. Wipe away stains with a dry cloth and cleaner. You can use a toothbrush or swabs to get into A/C vents, around dashboard knobs, and other tight places.
- Clean the windows – Use window cleaner and cloth to wipe down all the windows. Including the rear-view mirrors and sunroof. It is important to buff with a cloth until all streaks are gone, being particularly careful to clean the corners and around the edges. This will help avoid horrible smears whilst driving.
- Air out your car – Once you have completed the above steps. Open all the car doors, and air out your car for a few hours. Then put everything back in place in your car.
Found a paintwork scratch? Get your FREE estimate here
Exterior Car Valeting
Part of the enjoyment of owning a car is looking after it and there’s no better way to wash your car than by hand. Hand washing will also allow you to spot any paint scratches or minor dents that would have otherwise been missed.
If you would like to wash your car yourself, then it is a really simple process to follow, comprising of six easy steps:
- Mix water with car shampoo – Fill two buckets of warm water and add in some car shampoo according to the manufacturer’s instructions, then mix in. Car shampoos have ingredients that leave the car bodywork protected, so they’re important when you want to get your car really clean. If you are washing your car by hand then it is worth investing in a grit guard, just to make sure that your sponge or cloth doesn’t pick up any rinsed-off dirt when you place it in the bucket.
- Rise the car – Give the car an initial all-over rinse with the hose, and place your thumb over the top of the hose to get rid of any debris and dirt from your car’s paintwork. We recommend working from the roof downward, leaving your wheels till last so you don’t pick up any grit, which could scratch your paint.
- Don’t forget about those difficult areas – There are a few areas on your car vehicle that are particularly difficult to clean. One of these is the car sills, which are often forgotten about when valeting your car. Once the panels are done, open the car doors and wipe around sills and all of the parts of the car door that are not normally exposed. Pay attention to the car hinges and wipe around these using a cotton bud for the hard-to-reach areas. Bumpers and number (license) plates are another difficult area – rub shampoo foam on these areas with a soft paintbrush before rinsing off. Then rub a lint-free cloth moistened with vinegar over your chrome for a sparkling shine.
- Clean the wheels – Use a separate cloth or sponge to clean the wheels. If your wheels are only mildly dirty, then you may be able to use a mild soap (do not use detergent) and water to clean them. If your wheels are very dirty, you may need to use a de-greaser before cleaning them. Then use a specially formulated wheel cleaner.
- Rinse the vehicle – After you have washed everything, including the screens, use the hose or a clean bucket of water to rinse the entire vehicle and the excess shampoo away. Leaving residue on the car will just mean you will need to wipe it away anyway, so by rinsing the car you can make sure you remove any of that excess whilst it is still wet.
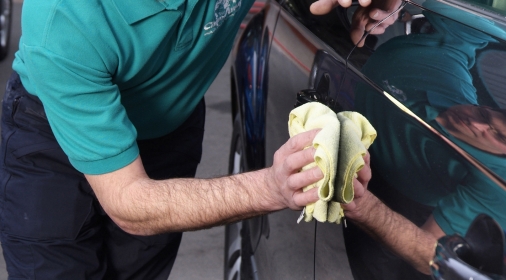
- Dry your car – The big challenge now is drying the car without streaks on the screens or smears on the paintwork. Treating your car like one big window can help. Squeegee water away in long, steady strokes. You can turn on the screen wiper to start you off. When using a towel, circular motions can help with drying your car.
Car Waxing
Once you have cleaned the exterior of your car and it’s completely dry, applying wax will add a layer of gloss and shine to your paintwork, and this will help keep your car looking sparkling clean all year round. Applying wax is easy once you know how. In order to apply wax you just need to follow a very simple process.
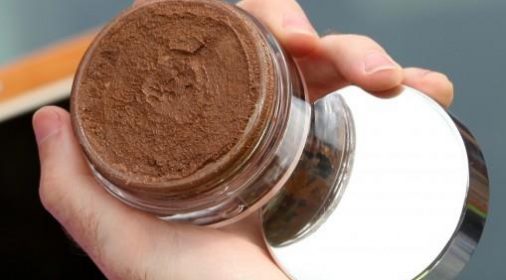
- Choosing a wax – First of all, you will need to decide on which wax to use. Traditionally, the ones containing genuine carnauba prove the best results, so ideally use a carnauba wax if you can. High-quality wax can set you back a bit, but often the results are worth it, so it is worth doing your research before waxing your car.
- Identify how you want to apply the wax – There are several different methods in the car valeting world for applying wax to the car. We recommend using a foam applicator as it allows you to spread the wax evenly and achieve a very thin layer across the surface cover of the car. If you’re using carnauba car wax, less is more. By using less it will reduce the cure time and makes it easier when you’re removing the remaining waxy residue. Click here to find out how you can get the best results with carnauba wax.
- Application – Apply a small amount of wax to the applicator by wiping the pad across the surface of the product. Then, working in small circular motions. You can begin to gently apply the wax onto the car making sure you cover the area evenly. Applying too much wax is a common mistake. A 10p sized coin amount should work fine for each 60cm x 60cm section of your car. Just to be sure, check the manufacturer’s directions as a reference.
- Buffing – You will need to wait between 10-20 minutes before buffing the remaining wax (optional). Where you can buff by hand, you can use a high-speed, dual-action, or random orbital buffer to apply more wax and buff out any imperfections. Set your buffer at a low speed, apply wax to the pad or directly onto the car, and start buffing. Apply more wax as needed. According to instructions, you may want to let the wax sit for a few minutes. After waxing and buffing, wait as long as the wax manufacturers recommend. This may require waxing or buffing in sections, stopping, and then wiping away wax.
- Remove excess wax – Using a microfibre cloth to remove any excess wax. Doing so will enable you to remove the excess wax in a couple of wipes.
Scratch and Dent Removal
Valeting your car will make it shine and help keep it clean; however, it won’t remove any scratches or dents in your car. If you have found any scratches or dents in your car, then at ChipsAway we are able to help. Our technicians are located throughout the country and offer highly rated SMART scratch repair and dent removal services to help you get your car looking like new. Fill in our form to get a free estimate today.


